Shipping Times
Metal Coated HDU Signs: Ship in approximately 3 weeks
Cast Signs: Ship in 3-6 weeks
Search for signs and plaques
Sign and plaque categories
Love our stuff but want something other than what you see? Get a custom sign quote!
Subscribe to our e-mail newsletter to learn about specials and giveaways.

If you choose to mount using the T-30 deck screw option, we will supply 3-inch deck screws (4-inches long for 2 inch thick signs) with a Star-Drive head, and we will pre-drill the holes in your plaque. Let us know if your situation requires different length screws. You will need a T-30 size Star Driver, and a drill bit to make a pilot hole in your wall. Size of this hole is left to you. Dense wood requires a larger hole to just engage the screw threads, while foam insulation board (not recommended) would require a smaller hole, or no pilot hole at all. Although not always necessary, you could add a little silicone or polyurethane construction adhesive to the holes before final setting of the screws.
Using the screws in masonry or brick type materials presents some other issues. Mainly the size of the pilot hole. Too large and you may not get the grip you desire (Actually, very little is required, and you could put a sliver of wood in the too-large hole and be just fine). Too small and you risk damaging the screw’s metal coating by using brute strength to seat the screw, or worse, you twist the head off of the screw. You will notice the the screws have an very aggressive thread, but in very hard materials you only need to engage a small part of the thread for an iron grip. You could experiment in an inconspicuous area. The screws that we use are called SPAX screws, and we use the 1/4 inch size. They are available from most big box home improvement stores. You might consider picking up a couple to use while you get the hole size right.
The screw heads are metal coated to match your sign. Avoid letting the Star Drive bit slip. This is best accomplished by having a large enough pilot hole drilled into your wall material. The screw should turn easily with a hand screwdriver when you are mounting your sign. Remember, Just Barely Snug, and No More!
Some care is required. Your plaque is made of High Density Sign Board. It can be dented or even break if forced. The metal coating adds a thin layer of hard material, but the plaque can be dented through the metal. Your plaque is light-weight and does not require much mechanical strength to hold it. Screws should not be over-tightened. Just a light contact with the plaque is sufficient and will avoid bending and the possibility of cracking.
If desired, or if you don’t have solid material to hold the screws, just apply polyurethane construction adhesive between the plaque and the mounting surface and use the screws to hold the plaque in place while the adhesive cures. Just be certain that you use enough adhesive to make good contact, but not so much as to leave a mess. Also be certain that the adhesive is compatible with your surface material. For additional holding power, score the back of the sign to provide more surface area. Scoring means scratching the back of the sign. You can use anything from a knife to a screw driver, to a file. Just be careful out there. Be absolutely certain to lay the sign on a soft, clean padded surface while you are doing the scoring.
This method often used on irregular surfaces such as stone or decorative blocks.
We mount fittings on the back of your sign that will accept the included screw rods (3″ anchor screws).
You will require a drill bit suitable for the material the plaque will be mounted to, and silicone adhesive, polyurethane construction adhesive, epoxy, or appropriate concrete material to fill the holes. The holes should be made oversize so positioning the sign can be done without forcing the screws and stressing the sign. You will also require a method of cutting the screw rods (hacksaw or bolt cutter).
Mark the location of the holes and then drill the holes. Attach the screw rods to the sign and do a trial fit. The rods should fit easily into the holes. This is the time to determine if the holes need to be deeper, or the screw rods cut shorter. This is also the time to determine the method you will use to hold the plaque in position while the concrete, epoxy, or adhesive sets.
Screw the rods into the pads using a little adhesive if you like. Careful on the depth! Go only as deep as the threads on the pads which is 3/8 inch. Put a suitable amount of silicone adhesive, epoxy, or concrete into the holes that you have drilled into the surface, and gently and evenly push the sign into place. Support while the adhesive or concrete sets.
Caution is required in two areas. One, you will have to turn the screw rods into the mounting pads and you must be aware that they only can go in about 3/8 inch. There is no stopper and further turning could result in the rod pushing though the front of the sign. Two, the sign base material is high density sign board. It can be dented, and could crack if forced. You will most likely be supporting the sign while the adhesive or concrete holding your anchor screws sets, so make a plan, and use care and padding.
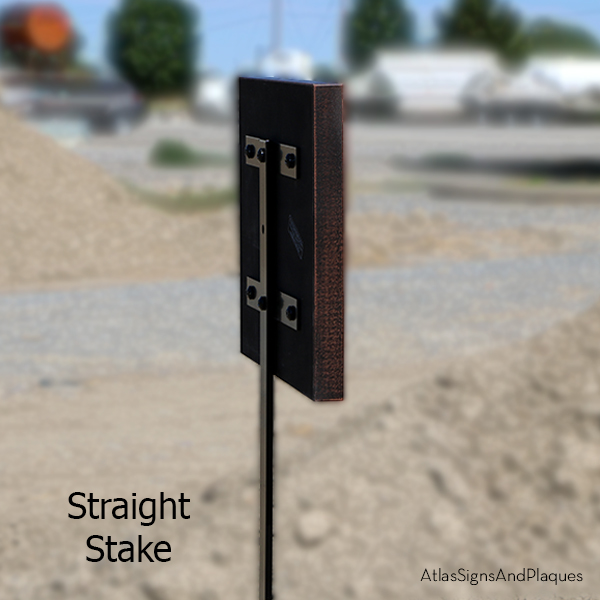
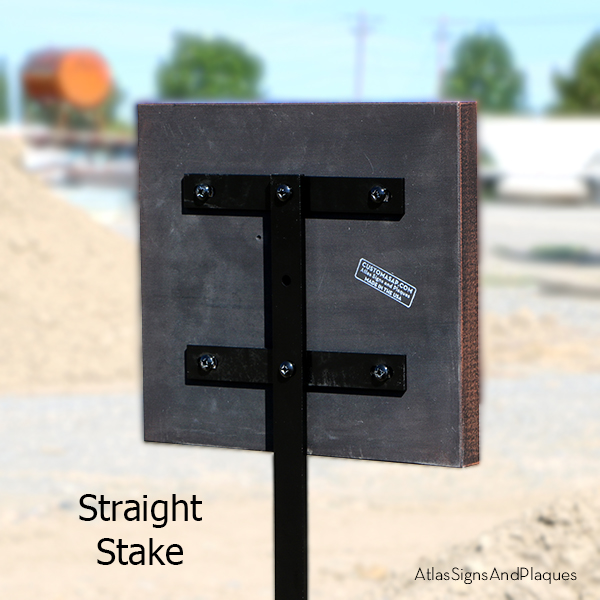
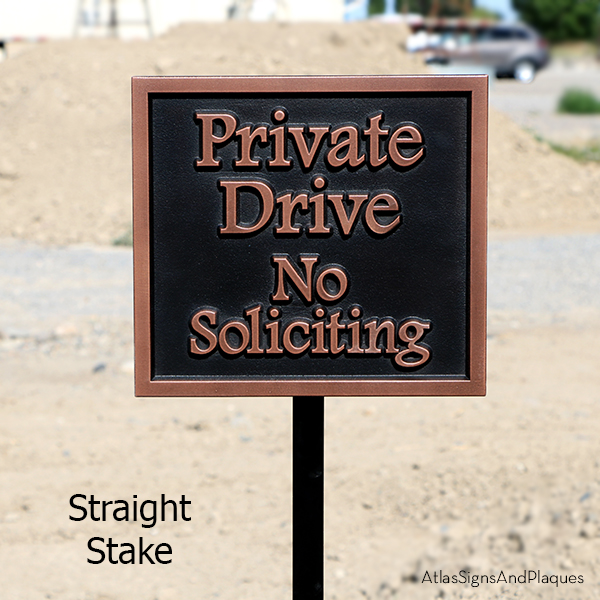
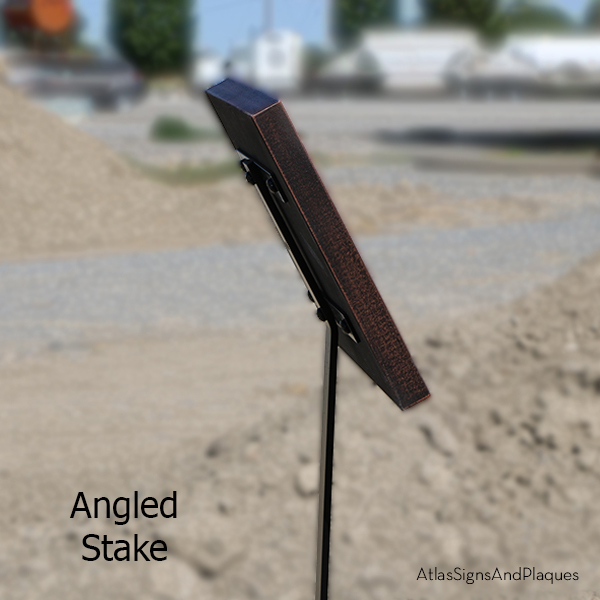
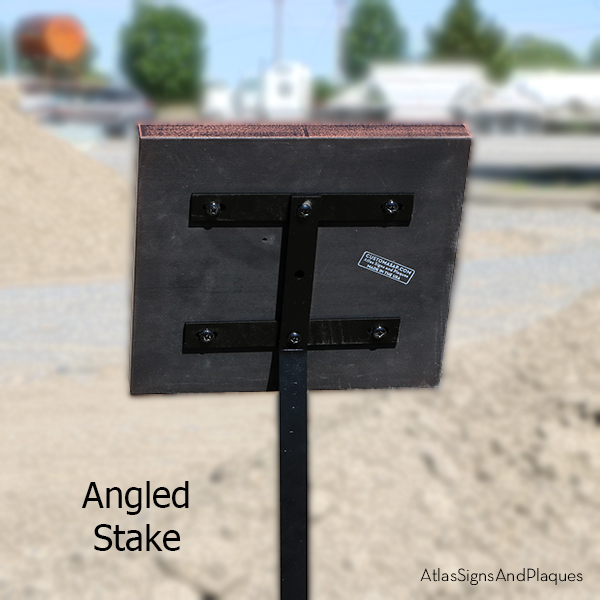
For displaying your plaque on a stake driven into the ground or your stake embedded in concrete.
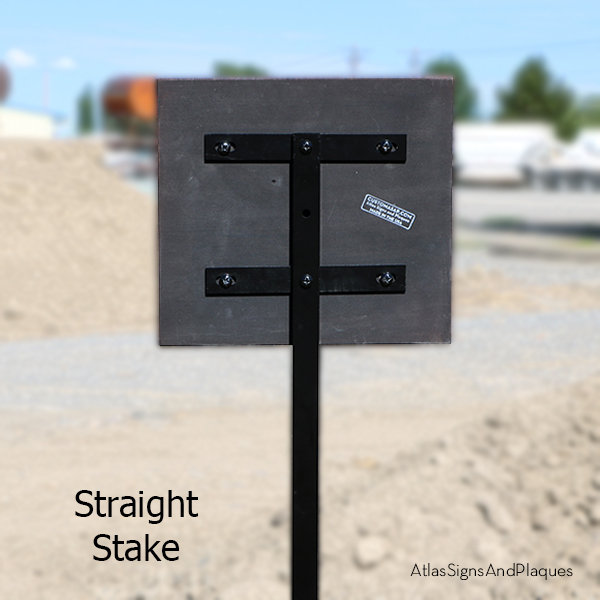
You will receive your plaque with all of the pieces necessary for a successful Ground Stake Mounting. The steel crossbars will already be attached to the back of the sign. In addition to the threaded inserts used by us to attach the crossbars to your sign, we install threaded screw inserts into the back of your plaque that match with holes on the stake that you purchase from us. Drive or push the stake into the ground, then attach the plaque to the stake using the supplied screws. The vertical post needs to be inserted into the ground at the desired location before proceeding. Do not mount the plaque before the stake is ready to accept it. Never pound or push on the plaque.
IMPORTANT NOTE: First, push the stake into the ground or in set in concrete. Then Attach your plaque to the stake with the supplied screws. Caution – Just snug only on the attaching screws. Do not over-tighten. Your installation is complete and you can take the rest of the day off! Well done!
Some care is required. Your plaque is made of High Density Sign Board. It can be dented. The metal coating adds a thin layer of hard material, but the plaque can be dented through the metal. Your plaque is light-weight and does not require much mechanical strength to hold it. Screws should not be over-tightened. Just a light contact with the plaque is sufficient and will avoid damage to the plaque or inserts.
ANOTHER IMPORTANT NOTE:
NOT recommended for plaques with a dimension of more than 20 inches either way.
The stake is 1″ wide, 1/4″ thick, and 48″ tall steel. Part of it goes into the ground, and part supports the sign. Do you want the sign placed right at ground level?
Another option is to install your own “post” not a stake and then screw the sign onto it. This gives you a sturdier setup for larger signs and keeps them at a comfortable viewing height, so you don’t have to crouch down to read.
If you go with your own “post”, you can request T-30 screws positioned vertically on the sign. Even better, you can mount a board slightly smaller than the sign onto the post first, then attach the sign to the board.
Result: strong, stable, and easy to read.
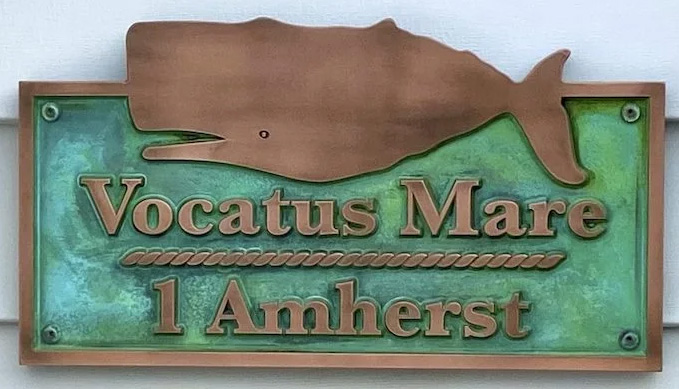
We install two threaded lag bolt eyelets into the sign. This is standard on two sided hanging signs, and an option on single sided signs. When an L-Stake or Bracket is purchased from us, we will space the eyelets to match. If you have your own idea for mounting, you may specify the distance required between eyelets. When faced with no information, our shop guys will place the eyelets at what we feel are appropriate spots, so it is up to you to specify if you have restrictions.
Consider for interior and exterior walls, doors, and stucco. Can be a good choice for smoother brick and stone surfaces as well.
When keyhole style hanger is requested. We include suitable screws that are appropriate to most situations. The keyhole method will work both interior and exterior and requires a flatter surface. For interior use, picture hanger hooks, or even nails, may be sufficient.
Measure the distance center to center of the keyholes installed on the back of the sign. Mark that distance on the wall. Measure again and verify accuracy. Measure twice or three times make sure you are right before you drill. Use a level to make sure that you have the holes even. Drive the screws into the wall but leave them out a little so they can engage the keyhole mounting brackets. For the best holding power, the screw heads should be adjusted to have some contact with the keyhole unit. If they are left loose, the sign can easily be lifted off the screws. This is fine for interior, but even moderate winds could lift your plaque and send it crashing. Using adhesive is highly recommended for exterior or exposed locations; use of a polyurethane construction adhesive is likely to be the most suitable. Be certain that whatever you use is compatible with your surface. After a trial fit, put some adhesive in the keyhole bracket holes, or stronger yet, put adhesive on the wall within the borders of the sign. The keyholes and screws will hold the sign while the glue sets, making a permanent installation.
We install industrial magnets (strong stuff) into the back of your plaque. This is, of course, only suitable for placement on ferrous metals (meaning iron or steel). This method is great for plaques such as “out to lunch” or for iron or steel locations where you don’t want to make holes. Exterior magnets are coated so they won’t corrode and leave rust streaks on your surface. We install between 1 and 4 magnets per sign depending upon size. We do not guarantee holding power, but we do have them at our homes and around the shop and they seem to work fine on metal doors and other ferrous surfaces.
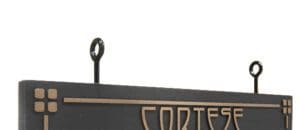
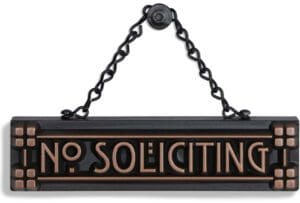
With this option your plaque will come with a decorative chain preinstalled at the top of your sign. Some of our smaller “mini” plaques will also have keyhole style hangers installed on the back in addition to the decorative chain. Keep in mind to hang the sign out of direct wind to ensure it won’t fall. This style of hanger is perfect if you will be changing signs regularly. Like… perhaps when guests arrive at your house you can use a “Please Remove Your Shoes” sign and when they leave you can hang the “No Solicitors” plaque back up. Or, if you have a business you can hang an “Out To Lunch” sign and then switch back to “Open” when you return. Have fun with it!
Appropriate U-Bolts are installed to the back of your sign making it possible to install on your existing fence or similar structure. To do this, we need some accurate information from you. Using the photo below as an example of the most simple mount of a smaller size plaque to a single vertical on a fence/post/structure, all we require is the dimensions of that element both width and depth. The reason is, we need to select and install a suitably sized “U” bolt into the sign back. Note: What we refer to as “U” Bolts actually look like regular machine bolts sticking out of the back of the plaque. The curved part of the U-bolt is buried out of sight, below the surface.
So that is the simplest method. Now let’s talk about a larger sign that will span more than 1 vertical member. As above, we need to know the dimensions of the members (so we can install appropriately sized “U” bolts). But since we are going to mount to more than 1 member, we also need to know the spacing. Now this is critical, the spacing dimensions that you give us need to be “center to center” and not the space between the members. So, to summarize, give us the width and depth of the members that you plan on mounting to, and the “center to center” spacing of those members. Center to Center means the distance from the center of one vertical member that will be utilized to the center of the other vertical member that will be used.
So far, we have been discussing the fence mount in terms of using the vertical architectural elements of your fence or equivalent structure. Everything said holds true if we utilize your horizontal elements. Since everything we do is custom, we can even utilize both the vertical and horizontal elements to help you place your plaque where you want it. Probably more than any other mounting method, the fence mount requires the greatest degree of accuracy in both measurement and installation of the mounting hardware.
Things get in the way. Meaning that existing decorative elements, varying dimensions, assumptions, and unique situations could cause surprises when your sign arrives. So talk to us, take photos, take photos with a cardboard version of your future sign, and think about how it will work. We can’t be at your site, but we can work it out together with good information and planning.
If you have questions, take a photo of your fence or other structure and email it to us. Then we can call you to discuss ideas and options. We will complete your sign and make our installations based upon the dimensions you give us, so while we are happy to discuss dimensions with you, we need to have it in writing from you.
As with all mounting methods, only tighten the sign to the fence just enough to hold it securely. That means “snug” rather than “tight”.
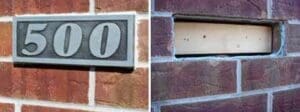
The description on many of the custom plaques and signs made by Atlas Signs and Plaques state that they may be used as a brick replacement. What we mean is that an existing brick can be removed and a house number or other plaque can be inserted into the hole. Of course, the mason could insert your plaque during construction, but that sounds too easy.
Decide where you will want the plaque and get dimensions of the hole that you will fill with the plaque. Most of the time with a replacement, you will chip out the mortar and use a larger plaque than the brick it replaces as in our photo below. In this case order the plaque just a little smaller than the hole to allow some room for hole irregularities and a little adhesive. As a rough guess, order the plaque about 1/8 inch smaller in both height and width (your call). You can, however, measure the brick you are removing get a plaque the same size. This gives a different look and requires that you find a mortar that is a good match to the existing mortar.
This method is recommended for concealed mounting on interior drywall. The plaque is drilled and tapped to accept a threaded stud. Do not attempt to install heavier plaques into drywall without additional reinforcements.
Tools/Supplies Recommended: mounting pattern, level, drill, drill bits, tape measure, tape, adhesive, compressed air, optional drywall anchors.
Download Full Installation Instructions
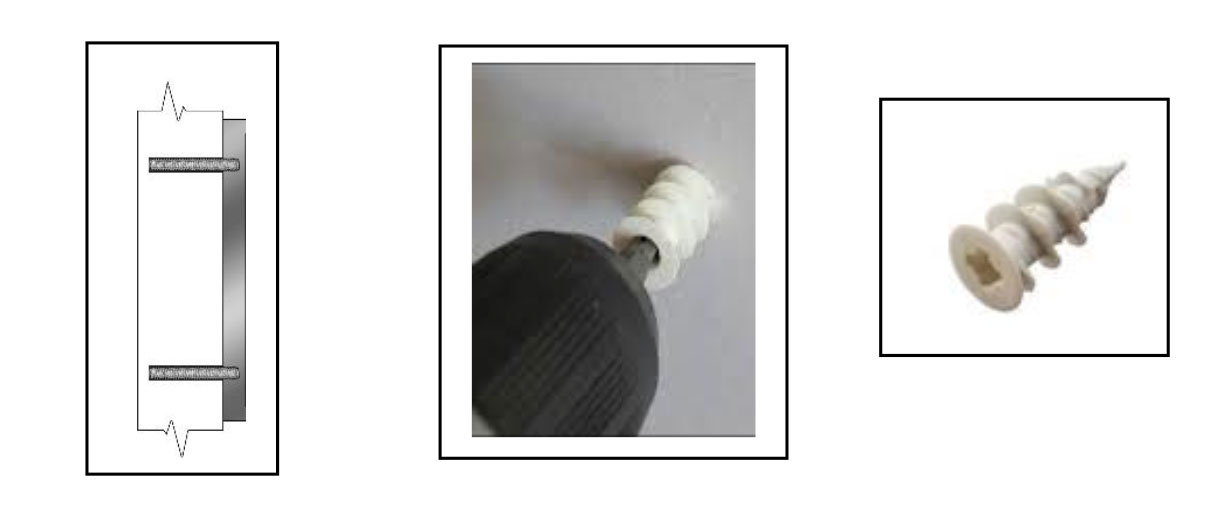
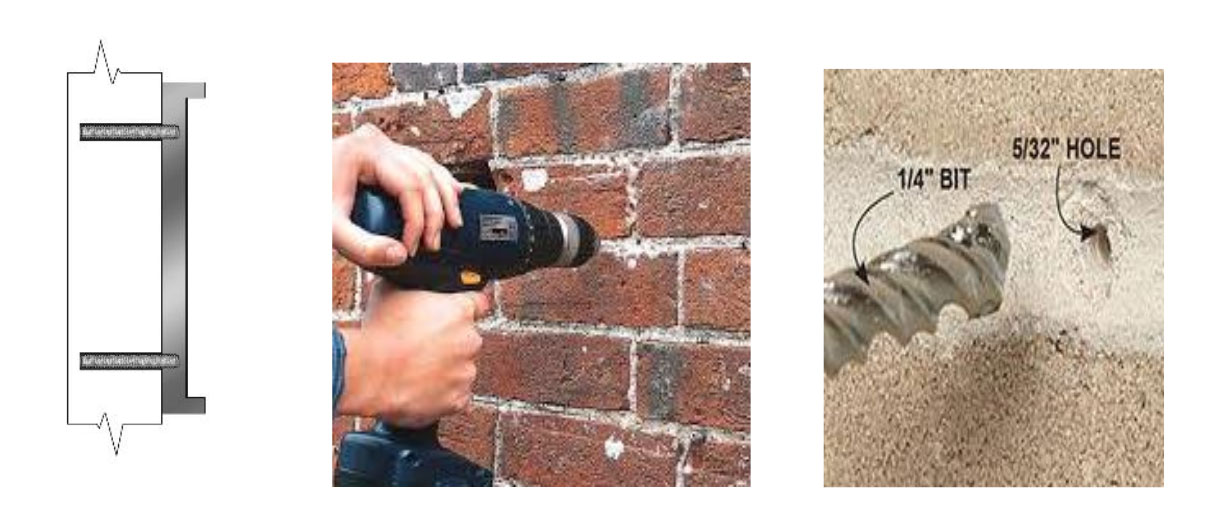
This method is recommended for concealed mounting on brick or masonry walls. The plaque is drilled and tapped to accept a threaded stud.
Tools/Supplies Recommended: mounting pattern, level, hammer drill, masonry bits, tape measure, tape adhesive, compressed air, optional masonry shields, optional wood strips/blocks.
Download Full Installation Instructions
Can’t be done. Don’t try it. Don’t ask.
Atlas has shopped industrial trade shows worldwide searching for double sided tape that will securely hold our signs and plaques. We have hundreds of samples with only two things in common. They are expensive, and, they don’t work. If you try it anyhow, you are on your own.
Choose this and you are left to your own devices… no, I’m not kidding.
So make sure you or your installer has a plan. HDU (the substrate of the signs) is closed cell meaning just any ol’ glue isn’t going to work. I have not found a double sided tape that works, so you can try one but if the sign falls off the wall all I can say is, “that sucks”. Do NOT keep taking screws in and out or all you’re going to be left with a big hole. Using mortar on the back as the only adhesive will not work. This is a closed cell product, in the vertical position. Not tile on a floor. Monkey type glue will work but you need to know how to apply it as it will make a mess. I can’t explain it here. And some of this comes from experience. You might be able to prop a ladder up to hold the sign, but the sign might fall. I don’t recommend tape on the face of the sign as it could remove some of the clear coat if you do not apply it properly, or use the correct kind of tape. Or maybe you do use the right tape but you leave it on in 105 degree heat and full sun. Guess what? If the tape fails, so then the clear coat fails. So really, I have so many options to choose from, for installing the sign, I suggest you select one from the above as a back up plan?